Initial setup#
Tip
We recommend you review the Glossary of Kolibri terms that will help you understand the terminology used in this guide, and make it easier for you to set up Kolibri for your implementation.
Setting up Kolibri will be different depending on your learning environment:
If you plan to use Kolibri independently at home, or for supplemental learning outside any large facility like a school, use the On my own option.
If you are installing Kolibri to be used within a formal facility like school, or in non-formal ones like libraries or community centers, use the Group learning option. In the steps that follow you will have the possibility to configure a full device for a new Kolibri server, or to set up a learn-only device.
Note
You will only need to do the initial setup once, when you first start Kolibri after the installation. You can change all the settings later.
On my own#
To do the initial setup of Kolibri for use at home, follow these steps.
Select the On my own setup option.

Select On my own for personal or home use of Kolibri.#
Select the default language for Kolibri.
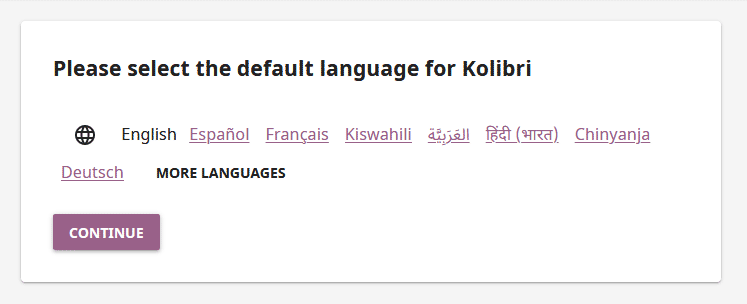
Select the default Kolibri language.#
Warning
The default language configured for content in your browser preferences might override the language you choose in this step. To ensure that Kolibri displays in the desired language, make sure to configure it as default in the browsers of all the devices that will be used to view Kolibri content.
Create a super admin account. This user will be a super admin, able to manage all the content and all other Kolibri users on this device.
Warning
Make sure to save these super admin credentials in a safe place!
Device super admin credentials cannot be retrieved when lost, and you will have to manually create another super admin account to manage your device.
Once you finish the initial setup, proceed to import some learning resources, and create users if more people at your home are going to be using Kolibri. Make sure to check how to configure other devices (computers, tablets or smartphones) in the home network to access Kolibri.
Group learning#
Select the Group learning option, recommended for schools, educational programs and organizations, or other group learning settings.

Select Group learning for use of Kolibri in group learning environments.#
Select the name for the device. Choose a meaningful and recognizable name because it will help you identify it during syncing and importing processes later on. If many devices are connected to your local network at the same time, the device where the Kolibri server is running must be easily recognizable for users on other devices who need to sync with it.
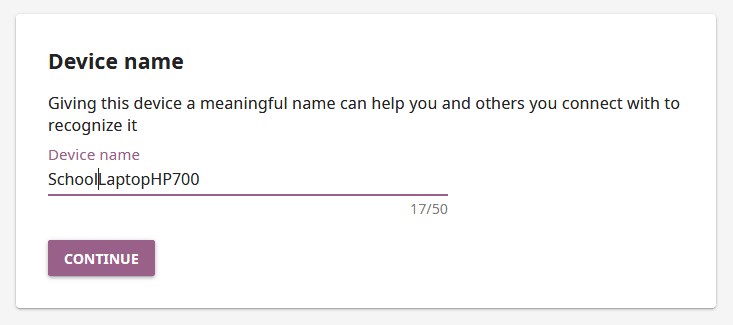
Select a meaningful name for the device.#
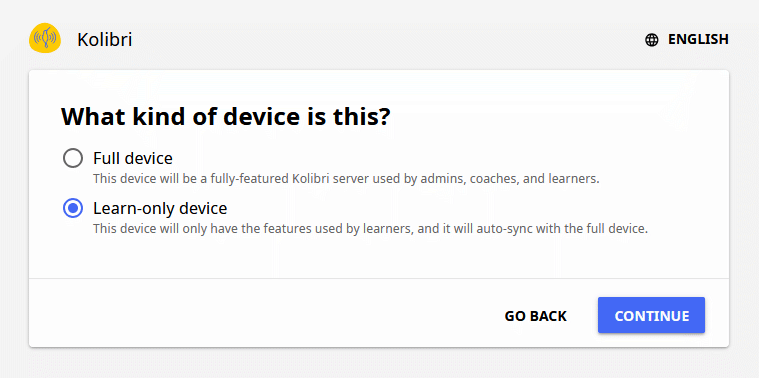
Select device type. If you want to set up a full device you can create a new facility, or import one from another device in your local network. To import only one or more learner accounts, select the learn-only device.

Select the how do you want to set up your device.#
Full device#
Create a new learning facility#
Select the Create a new learning facility option.

Type of facility. When you create a new learning facility you can choose between Non-formal (libraries, orphanages, correctional facilities, youth centers, computer labs and similar), or a Formal type of learning facility (schools and other formal learning contexts).
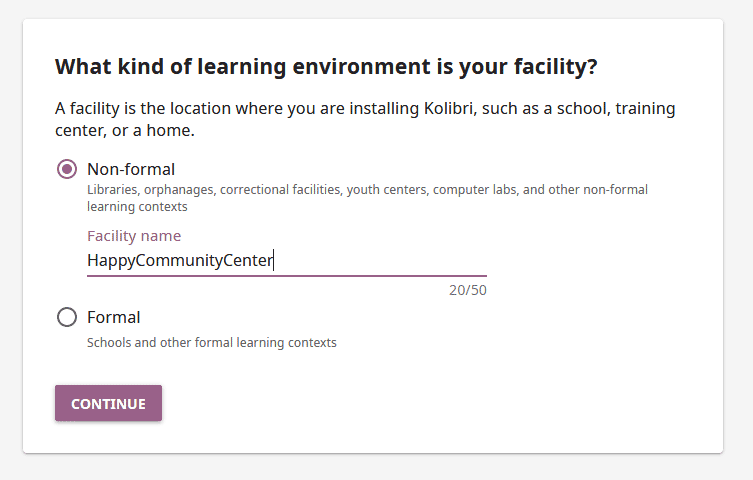
Select what type of learning environment is your learning facility and give it a name.#
Enable Guest access.
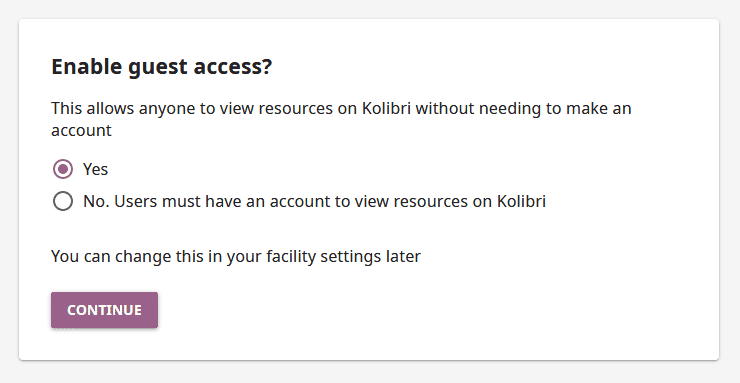
Select if guests can access Kolibri content without the need to create an account.#
User account creation.
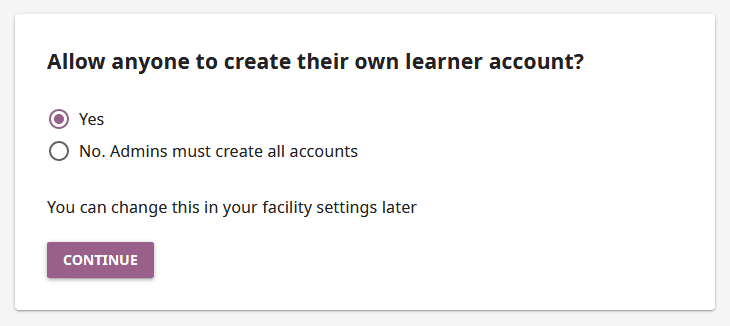
Select if anyone can create a user account for themselves, or if user accounts must be created by Kolibri admins.#
Enable passwords for learners. Simplified sign-in, without the password requirement, allows easier access for younger learners.
Responsibilities of the administrator. When you are setting up a Kolibri facility you need to take into consideration the relevant privacy laws and regulations. As super admin, you or someone you delegate will be responsible for protecting and managing the user accounts and personal information stored on the device. Review the data usage and privacy statement before finishing the facility setup.
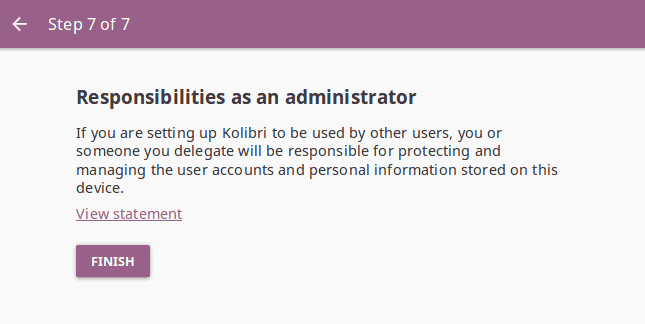
Review the super admin responsibilities regarding the data usage and privacy.#
Create super admin account. This admin user will be a super admin, able to manage not only the content, but also all users and permissions in this facility.
Warning
Make sure to save these super admin credentials in a safe place!
Device super admin credentials cannot be retrieved when lost, and you will have to manually create another super admin account to manage your device.
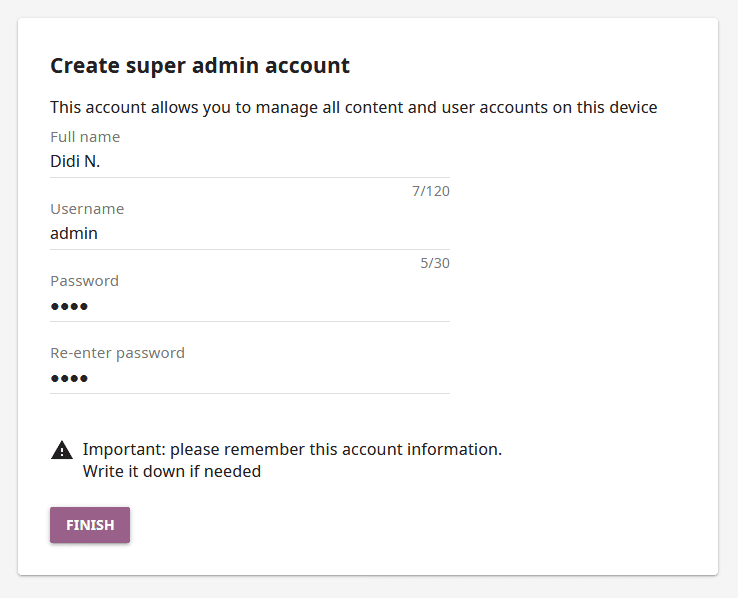
Select the username and password for the facility super admin.#
Once you finish the initial setup, proceed to import some learning resources, and create users (if you chose the Admin-managed facility setup).
If you are using the server-client setup (where learners are accessing their accounts on Kolibri server through a browser), remember to configure learner devices to access Kolibri in the local network.
If all the learners in your facility have their own learn-only devices, they will have the device auto-discovery and automated syncing configured by default.
Import facility#
If you are part of a wider learning environment, where several learning facilities like schools or community centers are managed by one central organization, or you need to sync the learner progress data from your facility with another device where Kolibri is running, you can choose to import a facility that is already set up on that device.
Select the Import all data from an existing learning facility option.

Any device that has Kolibri running in the local network should appear in the Select device window. Read more on how set up a local network in the Kolibri Hardware Guide.
Select the device and click the Continue button.

Select the device from which to import the facility.#
Note
If you do not see the address of the device listed, but you know the IP address, you can add it manually. Click the Add new address link, and fill in the required information.
Warning
Firewalls may impede your ability to see other devices in your local network or add them as source. If you are unable to see other devices, make sure to:
disable the firewalls on all the devices that you need to sync
restart Kolibri for broadcast to take effect
Select facility. If there are several facilities on the device, select the one you want to import.
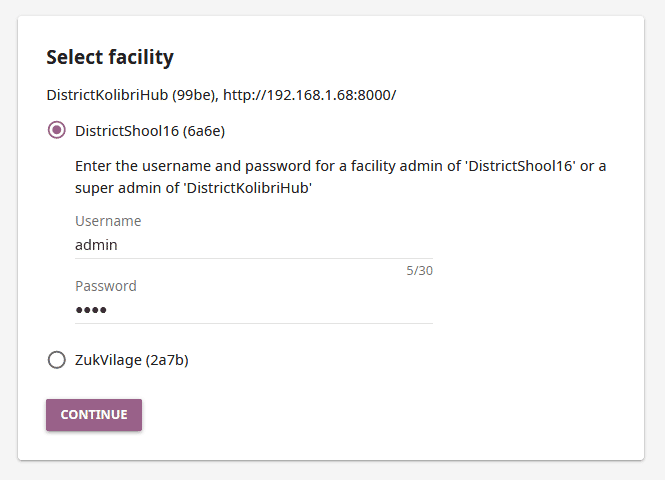
Select the facility you want to import.#
Provide the credentials (username and password) for either the facility admin of the facility you want to import, or for the super admin of the device you are importing from.

Provide admin credentials for the facility you want to import.#
Create a super admin account. The account you create in this step will be a super admin for your device, and be able to manage all the device content, all the facility users, and their permissions.
You can choose to create a new super admin account or to use the credentials of the super admin of the device from where you imported the facility.
Warning
Make sure to save the super admin credentials in a safe place!
Device super admin credentials cannot be retrieved when lost, and you will have to manually create another super admin account to manage your device.
Responsibilities of the administrator. When you are setting up a Kolibri facility, especially in formal environments like schools, you need to take into consideration the relevant privacy laws and regulations. As super admin, you or someone you delegate, will be responsible for protecting and managing the user accounts and personal information stored on the device. Review the data usage and privacy statement before finishing the facility setup.

Review the super admin responsibilities regarding the data usage and privacy.#
Wait for the facility data to load on your device. It may take some time, so please be patient. When you see the confirmation that the process is completed click the Continue button.
Learn-only device#
The user accounts on learn-only devices are always part of a learning facility on another Kolibri device (usually managed by their coaches or facility admins), and have the automated syncing configured by default so all learner interactions with the resources are synced with the facility on server device where coaches can oversee their progress.
When setting up a learn-only device, you can:
Create a completely new account on the facility on server device.
If you previously had an account on the server’s facility (when you used Kolibri at school or a community center) but now you have a personal device (tablet or a phone), you can import your original account from the facility on server device to this new personal device.
Warning
Learn-only devices only have enabled the features for learners (classes, lessons, quizzes, library, and bookmarks).
Keep also in mind that if you have a coach or admin user account on the main facility, and you want to import it on a learn-only device, you will only have access to the learner features on this new device, and not the coach and admin permissions you used to have on the main facility the account is imported from.
Select the Learn-only device option and click the Continue button.
Create a new account for an existing facility#
Select the Create a new user account for an existing facility option in the Select a facility setup for this learn-only device step.

Any device that has Kolibri running in the local network should appear in the Select device window.
Select the device and click the Continue button.
Warning
Firewalls may impede your ability to see other devices in your local network or add them as source. If you are unable to see other devices, make sure to:
disable the firewalls on all the devices that you need to sync
restart Kolibri for broadcast to take effect
Select facility. If there are several facilities on the device, select the one you want to associate the learner account with.
Create learner accounts. Enter the username and password for the learner account you want to create.
When you see the confirmation that the process is completed, you can choose to create another learner account on the same device. Otherwise, click the Finish button.
Once you finish the initial setup, you will see the Library page, where you can navigate the libraries of other Kolibris in the local network, and even download some resources form them to keep in the library of your own device.
Import one or more accounts from an existing facility#
Select the Import one or more user accounts from an existing facility option in the Select a facility setup for this learn-only device step.
Any device that has Kolibri running in the local network should appear in the Select device window.
Select the device and click the Continue button.
Warning
Firewalls may impede your ability to see other devices in your local network or add them as source. If you are unable to see other devices, make sure to:
disable the firewalls on all the devices that you need to sync
restart Kolibri for broadcast to take effect
Select facility. If there are several facilities on the device, select the one you want to import the learner account from.
Import individual learner accounts. Enter the username and password of the learner you want to import to your device.

Wait for the learner data to load on your device. It may take some time, so please be patient. When you see the confirmation that the process is completed, you can choose to create another learner account on the same device. Otherwise, click the Finish button.
Once you finish the initial setup, you will see the Home page with the classes you have been enrolled in the main facility, and their respective assignements. If the account you just imported to your learn-only device was not enrolled in any classes on the main facility, you will see the Library page, where you can navigate the libraries of other Kolibris in the local network, and even download some resources from them to keep in the library of your own device.