Channels and resources#
Note
To manage Kolibri channels and resources you must have the appropriate permissions.
Kolibri Channel is a collection of educational resources (video, audio, document files or interactive apps) prepared and organized by the channel curator for their use in Kolibri. You can import and export channels in Kolibri from the Channels tab of the Device dashboard.
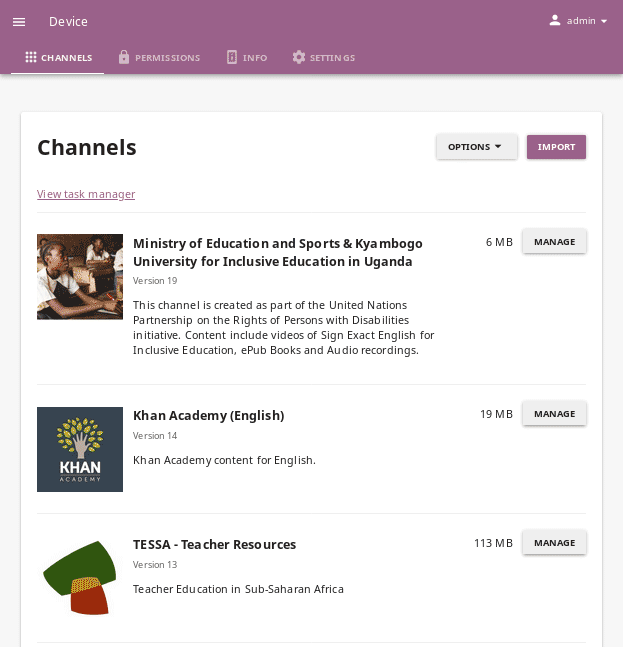
Kolibri channels in the Device > Channels tab.#
Each Kolibri channel has its own token in Kolibri Studio. You can freely view and browse resources to import from the public channels in Kolibri, but in order to import resources from private or unlisted channels, you will need the channel token from the resources curator who assembled it.
Note
The term Channel ID was valid for Kolibri versions up to 0.6, while from the Kolibri version 0.7 onward, we started using exclusively the term token to uniquely designate each channel.
Warning
When you use the Terminal or command prompt to import channels in Kolibri from the command line, you still must use the 32 digit channel ID, as the command will not work with the token. Make sure to receive the correct channel ID from the person who curated the channel you need to import, or refer to Kolibri Studio user guide how to find it in Studio user interface, if you have channel editor access.
Kolibri task manager#
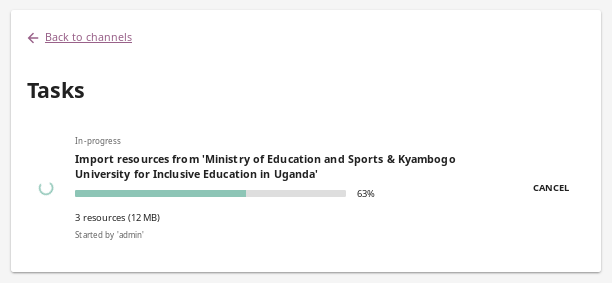
You can start various resource management tasks (import, export, deletion, update, etc.) in Kolibri and observe their progress in the task manager page. Each time you start a task, Kolibri will display the Tasks page, and depending on your workflow, you may have some Finished, In-progress, Canceled or tasks Waiting in the queue.
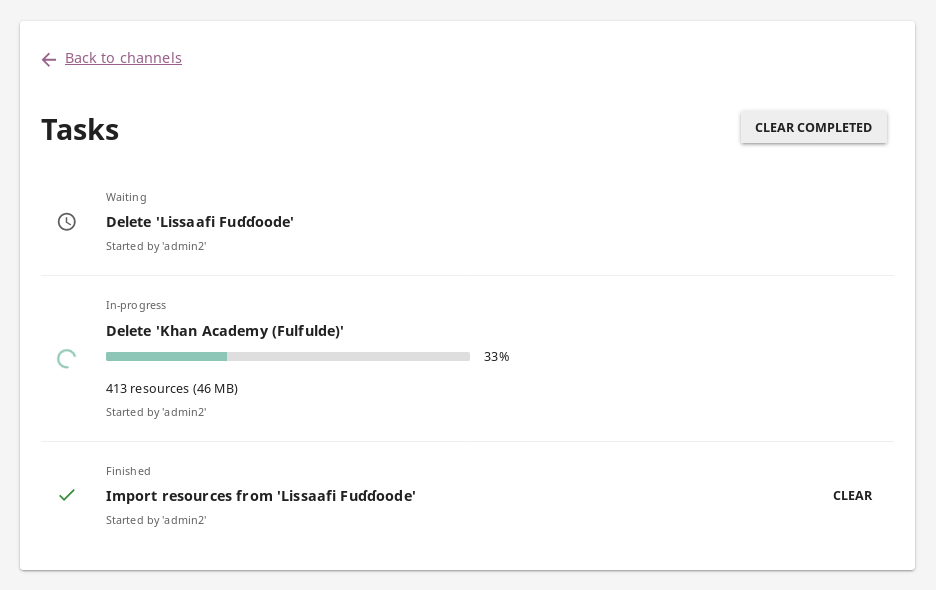
Kolibri task manager.#
Use the CLEAR button to clear single tasks.
Use CLEAR COMPLETED to delete all the tasks from the list.
Click the Back to channels link to navigate away from the Tasks page to the Device > Channels tab.
On top of the Device > Channels page you will see a summary of the current tasks. Click the View task manager link to return to the Tasks page with the detailed information.
Import channels and resources into Kolibri#
Warning
Important: You cannot import your own files (videos, documents, etc.) as learning resources directly into Kolibri from your computer. Kolibri can only import resources from:
already curated channels on Kolibri Studio, if the computer running Kolibri is connected to internet
another device in the same local network through peer import
OR
an external storage drive (USB or hard drive) where channels have been previously exported to from another Kolibri installation, if the computer running Kolibri is not connected to internet
To import your own files for use in Kolibri, you need to register at Kolibri Studio site (it’s free), and build your own channel that you can subsequently import into Kolibri. Read more about how to do this in our Kolibri Studio user guide.
To import resources into Kolibri, follow these steps.
Click IMPORT in the Channels tab on the Device page.
Choose the source option: Kolibri Studio, Local network or internet, or Attached drive or memory card.
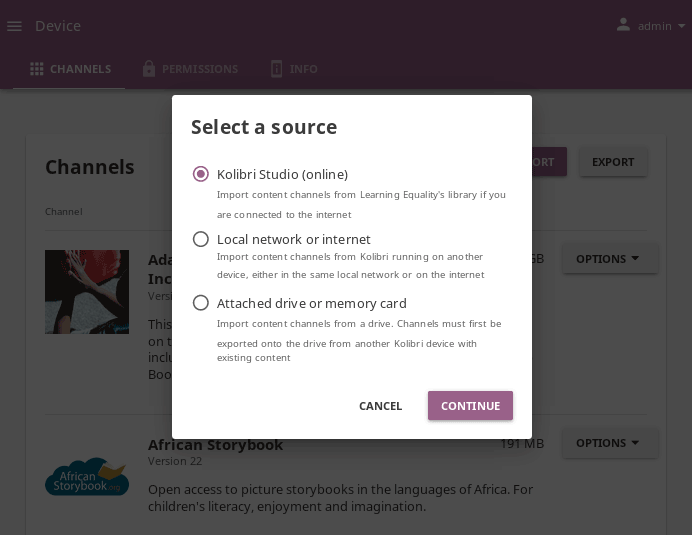
Select a source to import Kolibri channels.#
Import from Kolibri Studio#
If the computer where Kolibri is running has an Internet connection with the sufficient bandwidth, follow these steps to import resources channels.
Choose option Kolibri Studio, click CONTINUE and you will be able to see all the available public resources channels.
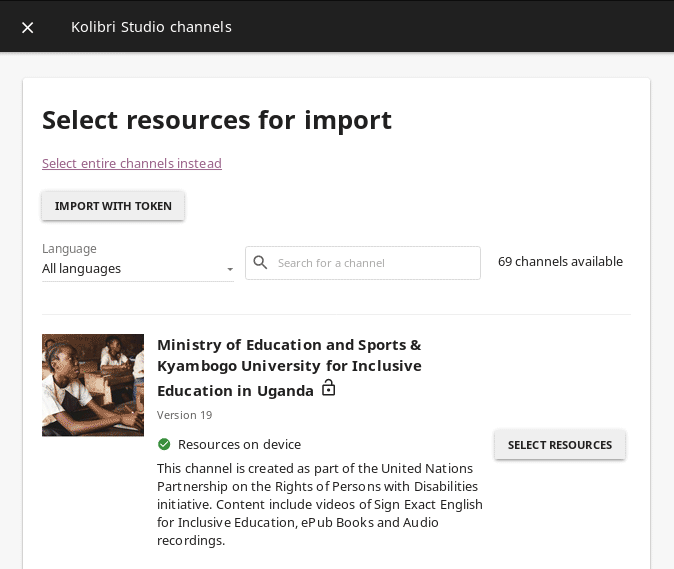
Select which public channel on Kolibri Studio you want to import resources from.#
Channels from which you have already imported some or all resources onto your device will have the (on device) icon.
Private channels have the (unlisted channel) icon.
Click SELECT RESOURCES for the desired channel, and wait for Kolibri to load the channel information and the topic tree.
Warning
This could take some time for big channels. Please be patient, as Kolibri needs to retrieve a lot of information to display.
In the following page you will see all the details for the selected channel: description, version, total size and number of learning resources, with the information weather you have some of the resources from that channel already imported on the local device.

Click the topics links to browse through the channel resources. Use the Select all checkbox to import all the resources in the channel, or select only certain topics or resources. As you keep selecting, you will see the total number and size of resources selected at the bottom of the page.
Click the IMPORT button once you finish selecting all the desired resources.
You will see the import progress in the Task manager page. Once the import concludes, the newly imported channel and resources display on the Channels page.
Import entire channels#
To import entire channels instead of a selected resources, follow these steps.
Click the Select entire channels instead link above the list of public channels in Kolibri.
Use the checkboxes to select the channels you want to import in full. As you keep selecting, you will see the total number and size of channels selected at the bottom of the page.
Click the IMPORT button once you finish selecting all the desired channels.
Warning
You can also use the Select all on page option, but beware that it will require several hundreds of gigabytes on your hard drive, and likely prolonged import times.
Import with token#
If you need to import resources from a private/unlisted channel, click on Import with token button above the channel list.
Enter the channel token received from the channel curator on Kolibri Studio.
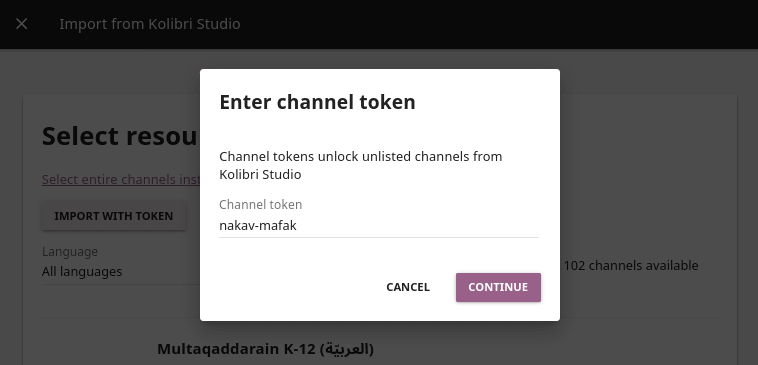
Click CONTINUE to unlock the channel, or CANCEL to exit.
Proceed to select and import channel topics and resources as for the public channels.
Unlisted or private channels in the list are indicated with the (unlisted channel) icon.
Warning
Unlisted channel must be published on Studio before the token can be used to import it.
Import more resources#
To add more learning resources from a channel that you previously imported resources from, follow these steps.
Click the MANAGE button for the desired channel.
Click IMPORT MORE.
Repeat the selection procedure from above.
Import channel collection#
Channel collection is a package of multiple Studio channels all associated with its unique collection token. You can use a collection token to import multiple channels at once in Kolibri, instead of importing channels with their individual tokens. To import channel collection, follow these steps.
Click the Select entire channels instead link above the list of public channels in Kolibri.
Enter the collection token received from the colection curator on Kolibri Studio.
Click CONTINUE to unlock the collection, or CANCEL to exit.
Proceed to select and import channels.
Note
Once import has finished, you will not see the collection, but just the channels it unclocked, listed among the others imported on the device.
Import from a local network or internet#
You can also import resources from a different device running Kolibri in your same local network, or even from a Kolibri server hosted outside your LAN, provided you know its exact IP address. This feature is useful for when you have:
a larger country- or region-level Kolibri server outside your LAN, but with resources specific to your implementation requirements
various instances of Kolibri servers in your local network, in order to support a high number of client (learner) devices
Note
Kolibri will try to automatically detect other instances (peers) running in the same LAN, and you will see a spinning loader while it is searching. When the detection is successful, you will be able to select these Kolibri instances and import resources from them.
Follow these steps to import from a local network.
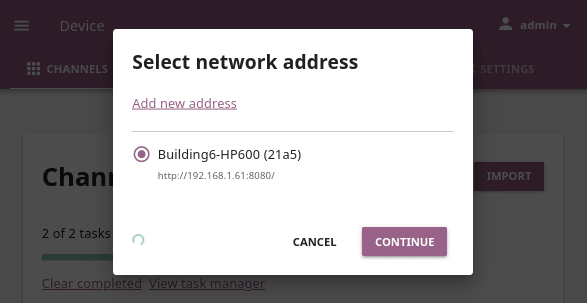
Choose option Local network or internet, and click CONTINUE.
Click Add new address link to add a new network address.
Input the full network address, and assign a name for this network. Don’t forget to add the correct port if different from the default one
8080. You can use either the IP address or the domain name.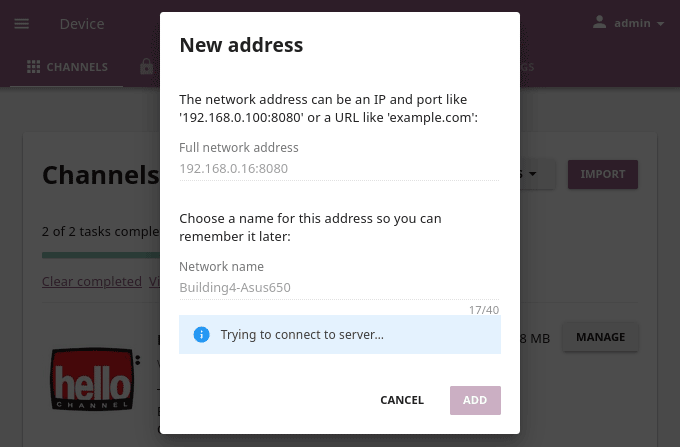
Click ADD to save this address to your device settings. If you later decide to delete it, use the link Forget.
Click CONTINUE and follow the same steps for selecting topics and resources as for the import from Kolibri Studio.
Warning
Beware that active firewalls on your devices could cause:
inability to be discovered by peers
inability to discover other peers
ability to be discovered, but not be available for import
On Windows 10 and 11 you need to explicitly allow both Python and
kolibri.exeprocesses through the firewall, to be able to add a peer for import. Auto-discovery might still not work, but you will be able to add the peer IP manually and import resources.This feature was introduced in Kolibri version 0.11, and all the server devices to be used for this type of resources import must have the Kolibri version 0.11 or later running.
Tip
If want to allow peer import of your private channels, which means that those channels will be visible and available for import on other peer devices in the same network, make sure to enable that option in the Device > Settings.
Similarly, if you want to import private channels from a peer in your local network, make sure that the peer device has the same option enabled in the Device > Settings, otherwise you will not be able to see or select those channels for import.
Import from a local drive#
If the computer where Kolibri server is running does not have access to Internet or has insufficient bandwidth, you have the option to receive resources channels stored on an external drive (USB stick or hard disk). Follow these steps to import resources channels.
Connect the external USB drive to your computer.
Choose option for Attached drive or memory card, and click CONTINUE.
Kolibri will automatically detect and display the drive(s) with available Kolibri resources files.
Select the drive where the desired channel is stored, and click CONTINUE.
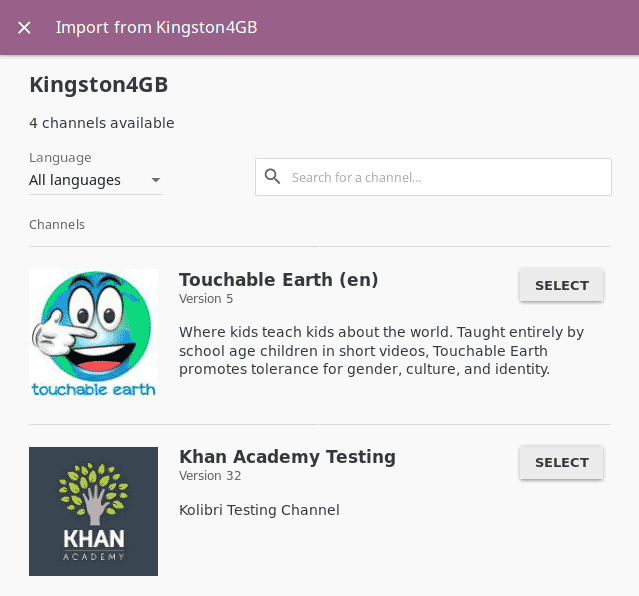
Click SELECT for the desired channel, and follow the same steps for selecting topics and resources as for the import from Kolibri Studio.
Update channels#
Public channels on Kolibri Studio are periodically updated from their original sources. Private and unlisted channels that you have on your local Kolibri device may also have changed since you first imported them. You can update your local channels from Kolibri Studio from online sources, from another updated device in your local network or from an external drive where the latest version of the channels have been previously exported.
Warning
It is recommended to schedule and perform channel updates only during periods of low activity on the server. Updating resources while server is receiving requests by client devices may cause errors or performance issues.
To update a channel to its latest version and import new resources into Kolibri, follow these steps.
Click the MANAGE button for the channel you want to update.
When a new channel version is available, you will see the notification. Click the View changes link.
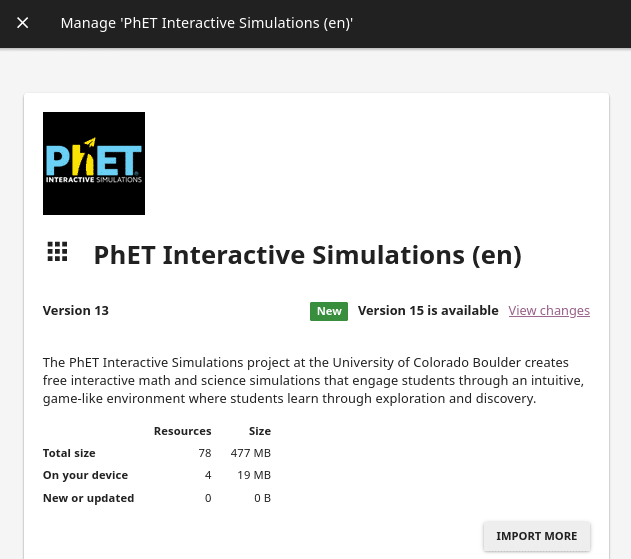
On the following page you can see the summary of the changes: how many resources will be added, deleted or updated if you decide to proceed.
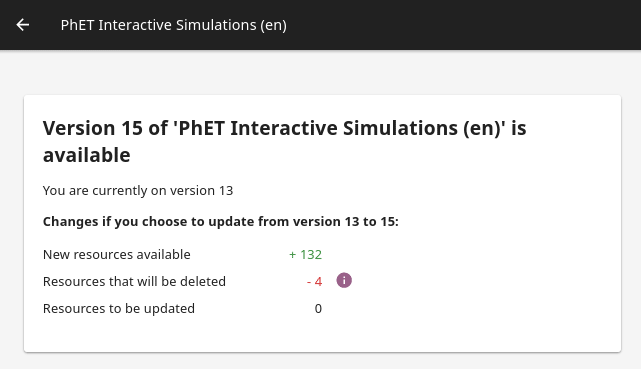
Notification for the new version of the resources channel.#
Click the UPDATE CHANNEL button, and then CONTINUE to confirm.
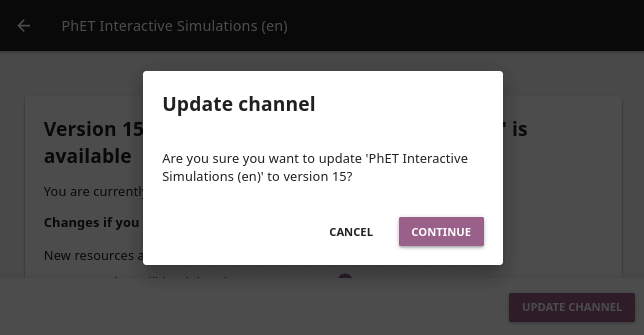
Confirm that you want to update channel to the new version.#
After the channel has been updated to the newest version, you will see the page with the list of all the topics that contain new resources. Proceed to select what you want to import, or check Select all to import everything at once.
Review the number and disk size of selected resources at the bottom and click the IMPORT button.
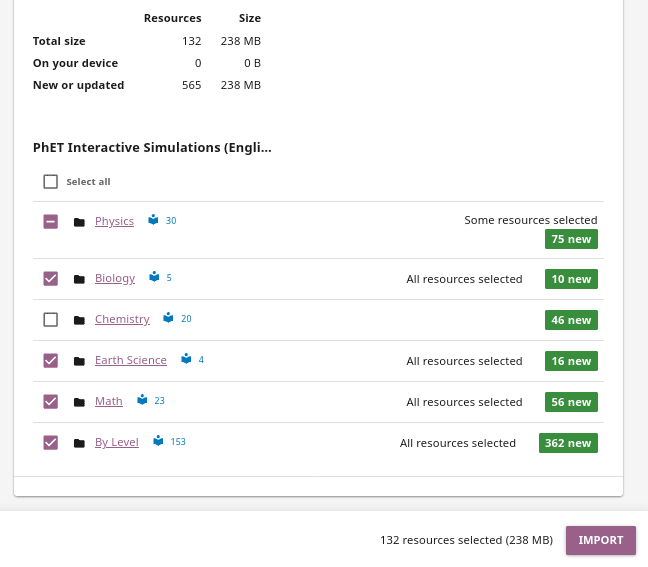
Select the resources you want to update.#
You will see the update progress in the Tasks page. Once the update concludes, the newly imported and updated resources will be available to use in Kolibri.
Warning
All import tasks can be cancelled before they are labeled as Completed in the Task manager page. However, beware that resources from canceled imports might not be fully available. If you plan to use the resources in lessons or quizzes, please check the state of their channel before you do, and use the IMPORT MORE button if necessary.
Edit channel order#
To change the order in which channels are presented to learners on the Learn > Channels page, follow these steps.
Click the OPTIONS button and select the Edit channel order option.
In the Edit channel order page you can either:
Grab the (drag) button to reorder channels with the mouse (drag and drop).
Use the (up) and (down) buttons to reorder by keyboard navigation.
You will see a confirmation notification at the bottom every time you change the order of the channels.
Close the Edit channel order to return to Device > Channels, and review their order on the Learn > Channels page.
Export from Kolibri to local drive#
If you have imported resources on one Kolibri device, and want to make it available on another computer where Kolibri is installed, you can export it either in full, or make a selection of the resources to be exported
Note
You must have an external drive (SD card, USB stick or hard disk) attached to your device.
Export complete channels#
To export one or more full channels with all of its resources on a local drive, follow these steps.
Click the OPTIONS button and select the Export channels option.
Use the checkboxes to select single channels you want to export, or the Select all on page to export all of them in bulk. As you keep selecting, you will see the total number and size of channels selected at the bottom of the page.
Click the EXPORT button once you finish selecting, or CANCEL to exit.
Select the local drive (destination for the export) where you wish to export Kolibri resources, and click CONTINUE.
You will see the export progress in the Task manager page. Once the export is finished, safely disconnect the drive according to the recommended procedure for your operating system, and proceed to import channels on other devices.
Warning
Beware that exporting complete channels might require a lot of available space on your local drive.
Export selected resources from a channel#
To export only a selection of channel resources on a local drive, follow these steps.
Click the MANAGE button for the channel from which you want to export resources, and wait for Kolibri to display the channel information and the topic tree.
Follow the same steps for selecting topics and resources in the topic tree as for the import procedure. As you keep selecting, you will see the total number and size of resources selected at the bottom of the page.
Click the EXPORT button once you finish selecting, or CANCEL to exit.
Select the local drive (destination for the export) where you wish to export Kolibri resources, and click CONTINUE.
You will see the export progress in the Task manager page. Once the export is finished, safely disconnect the drive according to the recommended procedure for your operating system, and proceed to import channels on other devices.
Note
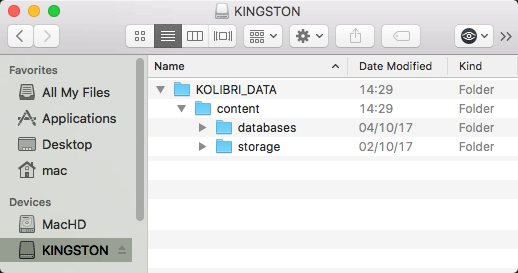
The above procedures copy the channel databases and resources from the content folder located inside the .kolibri folder on your device’s hard disk, and place them in the KOLIBRI_DATA folder on the selected local drive. This structure is recognized by the Import from local drive command.
Delete channels#
Delete complete channels#
To delete one or more full channels with all of its resources from your device, follow these steps.
Click the OPTIONS button and select the Delete channels option.
Use the checkboxes to select single channels you want to delete, or the Select all on page to delete all of them in bulk. As you keep selecting, you will see the total number and size of channels selected at the bottom of the page.
Click the DELETE button once you finish selecting, or CANCEL to exit without deleting the channel.
If you are certain you want to proceed, click the DELETE button again in the Delete channel confirmation window.
You will see the delete progress in the Task manager page. Once the delete task is completed, the channel(s) will not be listed in the Channels tab on the Device page.
Delete selected resources from a channel#
To delete only a selection of channel resources from your device, follow these steps.
Click the MANAGE button for the channel from which you want to delete resources, and wait for Kolibri to display the channel information and the topic tree.
Follow the same steps for selecting topics and resources in the topic tree as for the import procedure. As you keep selecting, you will see the total number and size of resources selected at the bottom of the page.
Click the DELETE button once you finish selecting, or CANCEL to exit without deleting the channel.
If you are certain you want to proceed, click the DELETE button again in the Delete channel confirmation window.
You will see the delete progress in the Task manager page. Once the delete task is completed, the selected resources will not be present in the topic tree of the channel.