Manage lessons
Kolibri Lessons offer you the possibility to prepare smaller selections of available learning resources and assign them to learners on a temporary basis. You can select resources from multiple channels, and copy the created lessons to other classes or groups as needed.
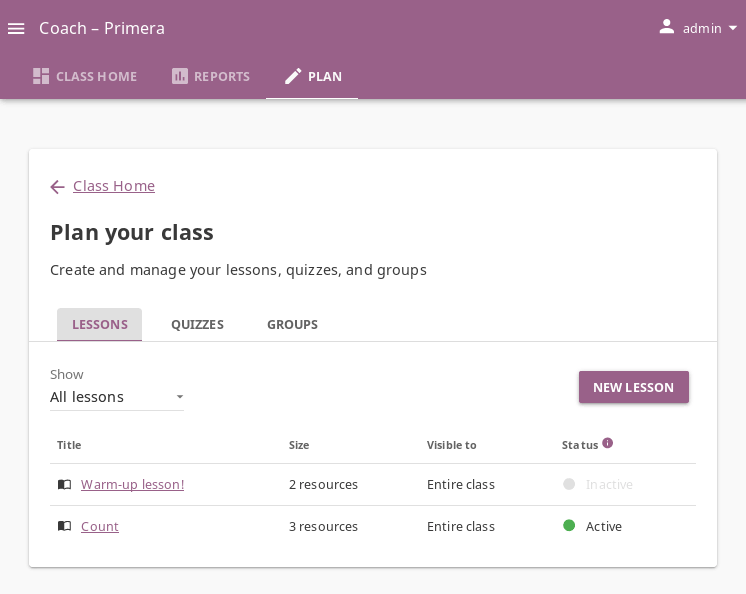
To view, create or delete lessons, as well as assign them to learners, use the Lessons sub-tab in the Plan tab of your Coach dashboard. Default view displays the list of all lessons created for the selected class, the number of resources they contain, groups they are assigned to, and their status indicator.
Note
To manage Lessons in Kolibri classes and groups, you must sign in as coach, admin or super admin.
Captions for the video are available in English, French, Swahili, Arabic, Hindi, Marathi and Brazilian Portuguese.
Create new lesson
To create a new lesson, follow these steps.
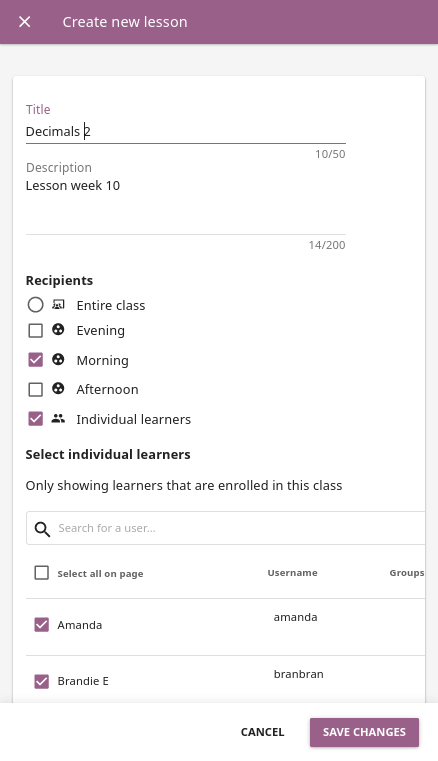
- Click the NEW LESSON button.
- Fill in the field for the lesson title, description and choose individual learners, groups or the entire class as the recipients.
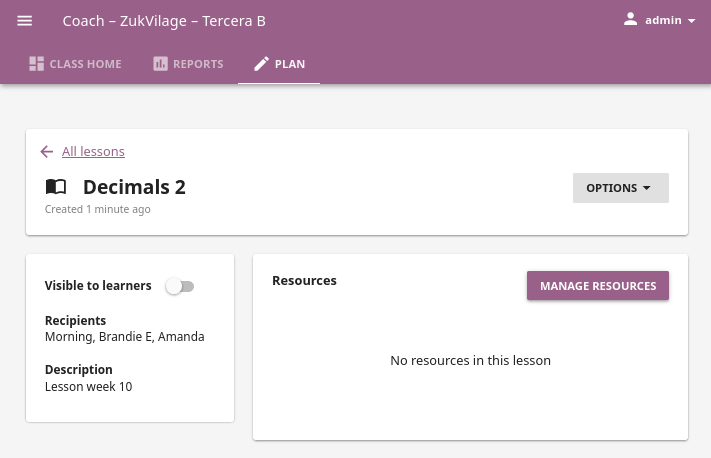
- Click SAVE CHANGES. In this step, the lesson does not have any learning resources yet, but you can see and edit some options.
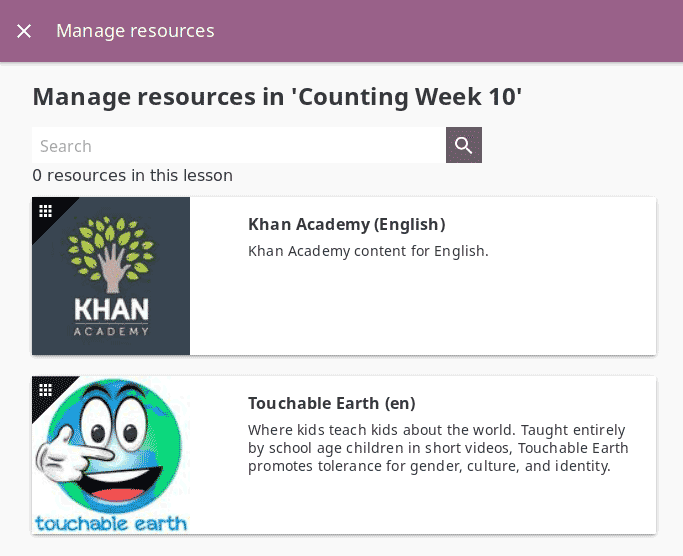
- Click MANAGE RESOURCES and select the channel from which you wish to select resources for the lesson.
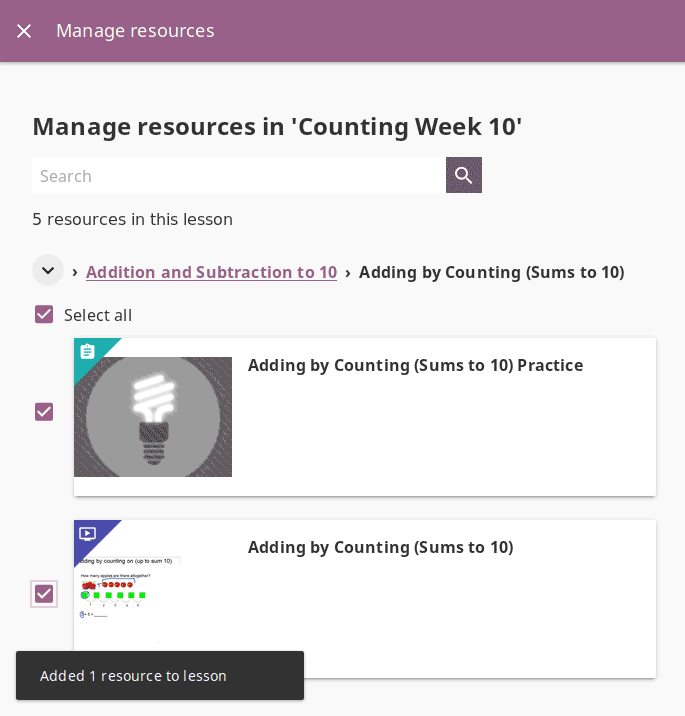
- Keep navigating the topic tree of the selected channel until you arrive to single resources. Use the checkboxes to select the resources you want to include in the lesson, and you will see a notification at the bottom of the page that the resource has been added.
- Use the Search feature to look for resources about a specific subject. Write the search term in the field, and press the ENTER key or click the (search) button to display the results. When you finish, click the EXIT SEARCH button to return to the list of selected resources.
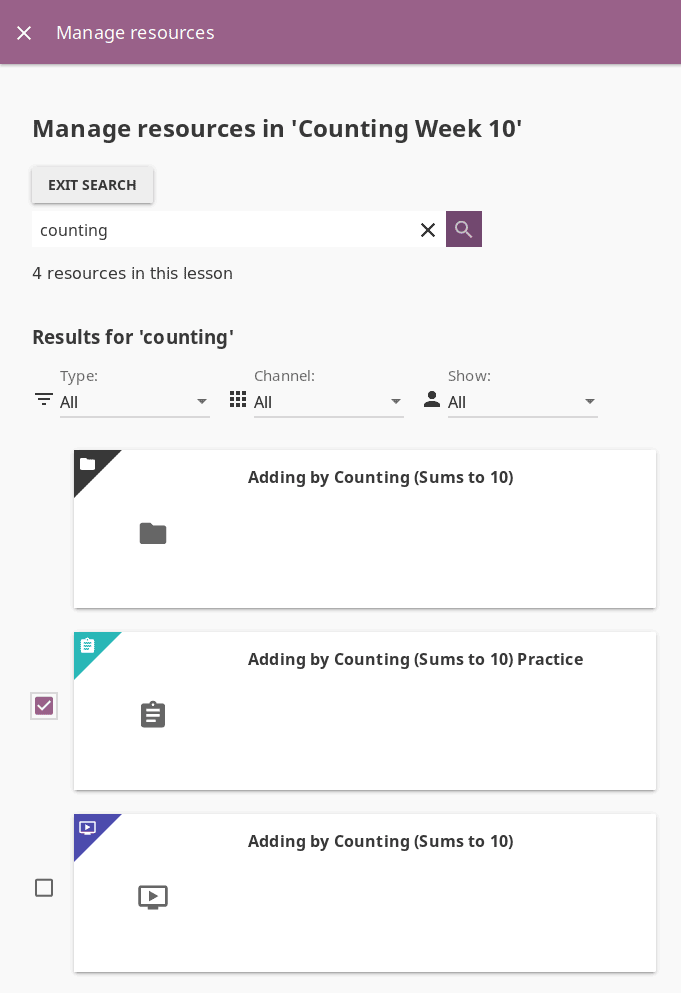
You can filter the search results by type of resource (video, document, exercise…), include only those from a specific channel, or exclude resources for coaches.
Click the CLOSE button to close the Manage resources window and return to the main view of the lesson.
After you’ve selected the resources for the lesson, you can:
Grab the (drag) button to reorder lesson resources with the mouse (drag and drop).
Use the (up) and (down) buttons to reorder by keyboard navigation.
Click the REMOVE button to delete a resource.

You will see a confirmation notification at the bottom every time you change something in the lesson.
To add more resources to the same lesson and keep editing if needed, follow the steps 4 to 9 again.
Change lesson visibility
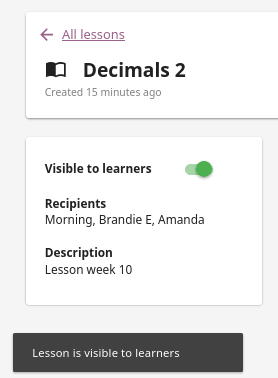
A newly created lesson is by default not visible to learners, and they will not see it in the Learn > Classes view.
Click the Visible to learners switch in the summary block to enable learners to see the lesson and interact with its resources.
Click the switch again to make the lesson invisible to learners once the designated time had passed.
Note
You can also change lesson visiblity from its own Report, and the list in the Reports > Lessons subtab.
Change lesson recipients
You can change the recipients of the lesson, reassigning the lesson to a different group or the entire class. Follow these steps.
- Select the desired lesson from the list in the Lessons tab.
- Click the OPTIONS button and select Edit details.
- Select the entire class, groups or individual learners to whom you wish to assign the lesson under the Recipients heading.
- Click SAVE CHANGES to confirm, or CANCEL to exit without change.
Copy lesson
To copy a lesson to a different group or another class of your facility, follow these steps.
- Select the desired lesson from the list in the Lessons tab.
- Click OPTIONS and select Copy lesson.
- Select the class to which you wish to copy the lesson to.
- Select the entire class, groups or individual learners to whom you wish to assign the lesson.
- Click COPY to confirm, or CANCEL to exit without change.
If the lesson is copied to another group in the same class, it will appear in the Lessons tab as the Copy of…. Follow the steps in the next heading to rename it.
Rename lesson
To rename a lesson, follow these steps.
- Select the desired lesson from the list in the Lessons tab.
- Click OPTIONS and select Edit details.
- Change the lesson title in the confirmation window.
- Click SAVE to confirm, or CANCEL to exit without renaming the lesson.
Delete lesson
To delete a lesson, follow these steps.
- Select the desired lesson from the list in the Lessons tab.
- Click OPTIONS and select Delete.
- Click DELETE in the confirmation window to proceed, or CANCEL to exit without deleting the lesson.
